
Do you want to experience some of the most jaw-dropping nature that the United States has to offer? Do you want to hit the open road and see vastly diverse scenery, all within one state? Is checking off national parks on your bucket list? If any of these things sound up your alley… then this is the road trip for you.
Perfectly situated for adventure, Utah is an outdoor paradise, with ample open spaces to roam, hike, bike and get lost in. Yet for all its natural splendor, the Mighty Five National Parks stand above all else when it comes to must-sees in the state. Zion, Bryce Canyon, Capitol Reef, Canyonlands and Arches National Parks all have their unique draws, but combining them together for an epic road trip is when you can truly marvel in all of their majesty.
Day 1: Arrival
Table of Contents
ToggleThere are two options for starting points for this particular adventure: Las Vegas or Salt Lake City.
Option 1: Las Vegas
We recommend flying into Las Vegas if you want to spend some time in Sin City and then check out the Grand Canyon and Hoover Dam (see our road trip guide to Vegas, the Grand Canyon, and Joshua Tree here!)
You can then drive into Utah from the south. This route is great if you want to hit Zion and Bryce Canyon, as these two are the furthest south of the Mighty Five. The drawback is that accessing the other National Parks (Capitol Reef, Canyonlands, and Arches) adds pretty significant driving time on your way back to Las Vegas. 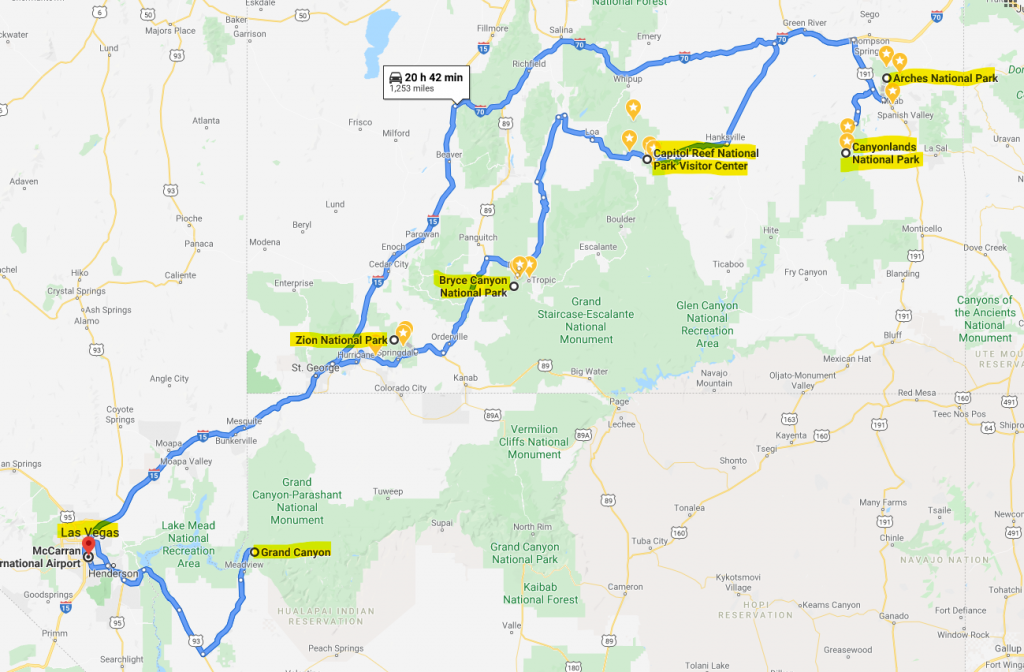
Option 2: Salt Lake City
The other option for a good starting point (and what we decided to do on this particular trip,) is to fly into Salt Lake City.
Salt Lake City and the Great Salt Lake which it’s named for are definitely worth spending a day in, and from here, you can stock up on water and snacks you need for your adventure, or save the day in Salt Lake City for the end of your trip. Do keep in mind you’ll be driving quite a long way, and once you get out of the Salt Lake City area there are not too many stopping points.
Using Salt Lake City as a jumping off point, you can hit all five of these National Parks in a clockwise or counterclockwise loop. We decided counterclockwise was the best way to do it, as we were most excited for Zion and Bryce and we wanted to see those first. 
Practical Information and Tips:
- Unfortunately, it’s very difficult to get around these areas without a car. You can easily rent one at whichever airport you fly into, like Salt Lake City.
- As we’ve mentioned in other posts, the U.S.’s National Parks have individual entry fees, so it is well-worth it to invest in a National Parks Service America the Beautiful Pass if you’ll be visiting several parks. Note: They have an excellent senior discount if someone traveling with you qualifies, as well as free passes for members of the military. The Annual Pass costs $80 and expires after a year, but for those over 62 the $80 pass is a lifetime pass.
- We had a much harder time finding places to refill our water than we thought we would– we would definitely recommend packing lots of water and whatever snacks you may think you need. While certainly popular with tourists, the parks in Utah aren’t quite as popular as the Grand Canyon, so the infrastructure is a little less planned out.
- Wear comfortable, weather-appropriate clothing and shoes— we cannot stress this enough! Depending on the season, these parks alternate between unbearably hot or unbearably cold, so prepare accordingly. We especially recommend moisture-wicking cotton for the sweaty days, and specifically these great CoolMax hiking socks from REI.
- Go either very early (our preference!) or late in the day, as you will beat the crowds and get beautiful light for photos. In the summertime, this is also the best way to beat the heat. As always, take lots of photos and “leave no trace”— be a good visitor.
Itinerary:
- Day 1: Fly into in Salt Lake City + Drive to Zion (Over 4 hours driving)
- Day 2: Hike in Zion
- Day 3: Drive to Bryce Canyon early in the morning (2 1/2 hours from Zion.) Pick a shorter hike in the afternoon (suggestions below!)
- Day 4: Hike into Bryce Canyon
- Day 5: Capitol Reef
- Day 6: Canyonlands
- Day 7: Arches
- Day 8: Salt Lake City + Fly home
Day 2: Zion
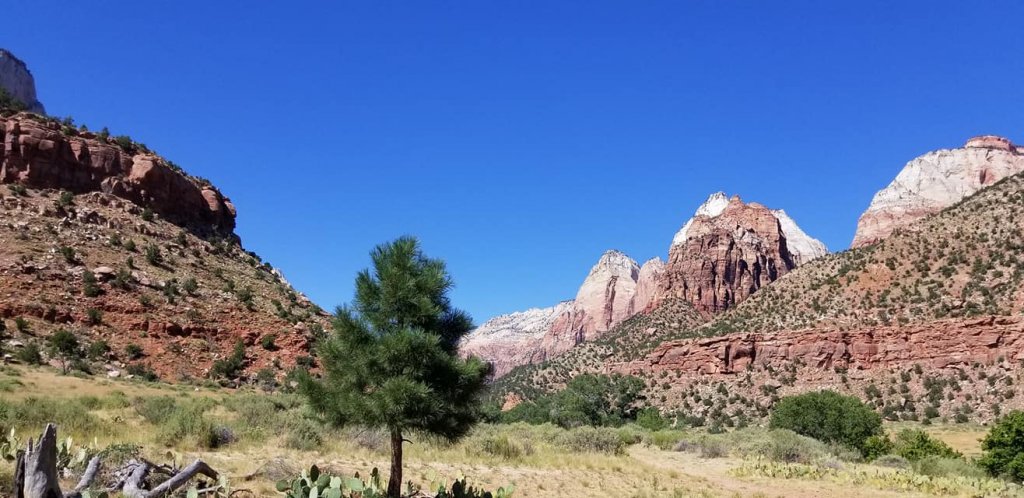
Zion National Park’s religious name made me think of all kinds of biblical imagery prior to arriving at the park, and after leaving the park I have to say that the name fits. The canyon itself is an oasis of beautifully colored rocks and tranquil nature– you really feel like you are in a very special place as everywhere you look it is just so, so pretty! There are a few options for lodging around here. We stayed in an Airbnb just outside of the park, but there is also a lodge inside the park as well as a small town called Springdale nearby. As with all the National Parks on this trip, pop into the Visitors’ Center when you first arrive to get a map and inquire if there are any programs that you want to attend. Many of these programs are geared towards children, but there are also some really unique programs discussing the geology of the area, the history of the indigeneous tribes, or star-gazing.
Be aware that you are not allowed to drive past a certain point in the park, as they want to limit congestion and pollution in the area. If you do not want to walk the whole distance from your parking spot to your desired hiking trailhead, you should take the shuttle, which starts running at 6 AM in the summer and 7 AM in the spring/fall. They arrive every 10-15 minutes or so, and definitely be prepared to wait.
Zion has many excellent hikes fit for a variety of different difficulty levels and desired sights. While you almost cannot go wrong with any of the hikes offered here, Angel’s Landing and The Narrows are probably the most famous ones.
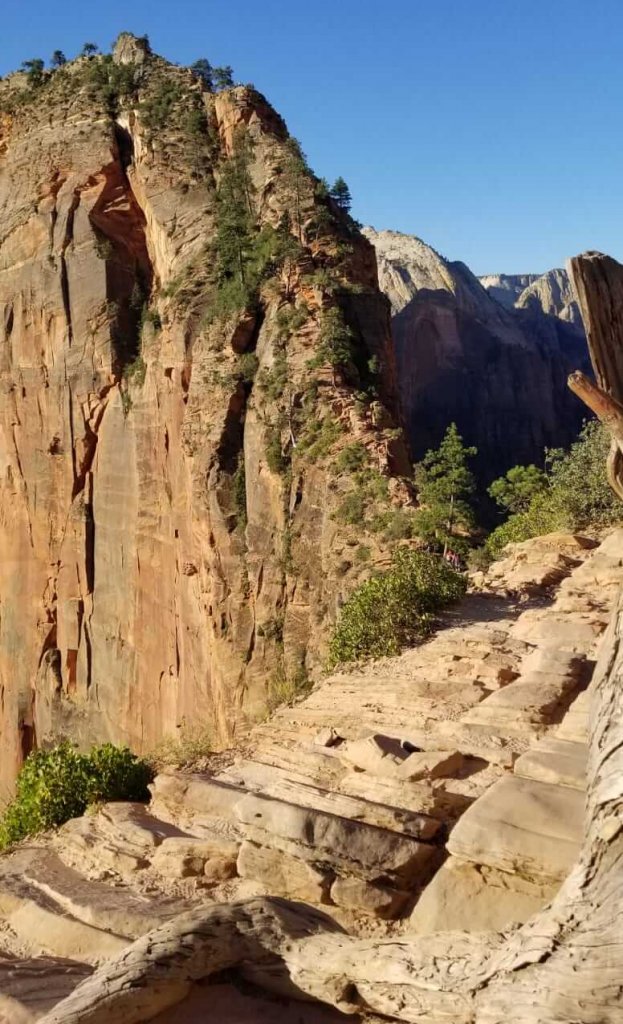 We guarantee you that Angel’s Landing is the epic hike you have been looking for. This is the premiere hike in Zion National Park, and it is certainly not for the faint of heart. To get there, get off at shuttle stop 6 and head across the Virgin River (here it is more of a trickle than a river), and follow the signs for Angel’s Landing.
Most of the way up it is pretty standard hiking, with a paved path and gentle incline. The trail will start to zigzag back and forth once you are getting further up the mountain, and the incline starts to increase. We did not find this part particularly difficult, and you will have a little respite when you are about halfway up– there is a flat portion that leads you almost into the mountain.
After this there are more switchbacks that are steeper this time, leading you up to Scout Lookout. This is a good place to stop and take a break, as there is a bathroom and a little space to sit on the rocks. Scout Lookout is also the turn around point for many people, as the remaining half mile of the hike is difficult and full of steep drops– Alex is quite afraid of heights and this bit of the hike was one of the scariest things he has ever done.
Essentially, in order to get to Angel’s Landing you have to climb on the side of the mountain for a part of this portion with a metal chain attached to the rock for something to hold onto. There is also a part of this hike where there are sheer vertical drops on either side of you, and the path is only three feet wide or so. Definitely not for the faint of heart, but the summit of Angel’s Landing is really incredible– you are able to see pretty much the entire canyon from this vantage point. It is absolutely stunning, and definitely makes the harrowing hike up worth it! Remember to go at your own pace and be extra careful.
While we did not end up doing The Narrows, it is very popular and worth your time, depending on what you are looking for. Hiking The Narrows involves traversing through part of the Virgin River to the north of the Zion Canyon. If you get off at the last stop on the shuttle, (Number 9), to start this hike. Very important– make sure to check in at the Visitor Center prior to going on this hike, as conditions can change rapidly and you want to be safe. Flash floods do occasionally come through, and you do not want to be caught unprepared.
Day 3-4: Bryce
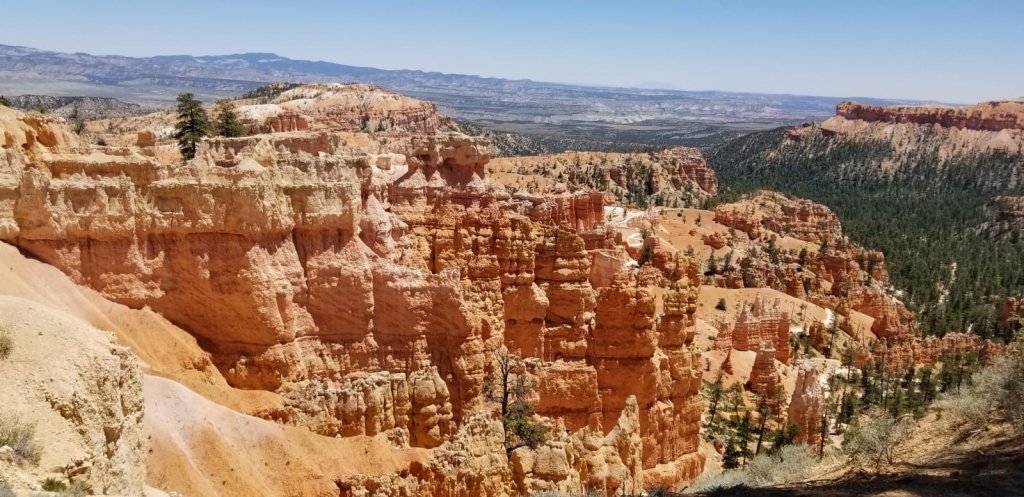
In our opinion, Bryce Canyon is probably the most magical of the Mighty Five. This park is truly a geological wonder, filled with unique hoodoos (tall rock spires) that will make you stop in your tracks and marvel! We were expecting to like Bryce Canyon, but were totally caught by surprise by how much we loved it. We ended up deciding that Bryce was our favorite of the five that we visited in Utah!
Driving from Zion to Bryce Canyon is not that far– 2 to 2 ½ hours– but we were amazed at how different the landscape is and how much variety there is in nature here. The park itself is one massive rim at the top where you drive around, and then where the hoodoos are is a labyrinth of intricate rock formations and trees called the Amphitheatre. Check out the Visitor Center for maps, trail recommendations, and climate and weather tips.
Bryce Canyon also offers a handy hop-on/hop-off shuttle that will take you to the major attractions, but you are able to drive the whole scenic route on the rim. Driving along this road allows you the opportunity to jump out of your car and take a few pictures at any or all of the observation points on the rim. While you can find spectacular views from pretty much anywhere on the rim our favorites were: Sunset Point, Rainbow Point, and the Natural Bridge.
After you are done admiring the stunning Amphitheater from above and want to trek down into it you have lots of options for hikes.
One of the most popular trails is the Navajo Loop, which affords plenty of chances to get up close to the hoodoos. If you are feeling more adventurous, you can extend the Navajo Loop to the Queen’s Garden trail or Peekaboo Loop. Both are excellent, but the Peekaboo Loop is longer and more strenuous, so we would recommend the Navajo to Queen’s Garden connection if you were to pick only one trail.
Tip: Another option for seasoned hikers is the Fairyland Loop. We trekked out at first light and found the Fairyland Loop to be almost empty– we passed less than ten people the entire time we were hiking. This isolation combined with the morning light hitting the hoodoos made for a hike that we will always treasure.
Day 5: Capitol Reef
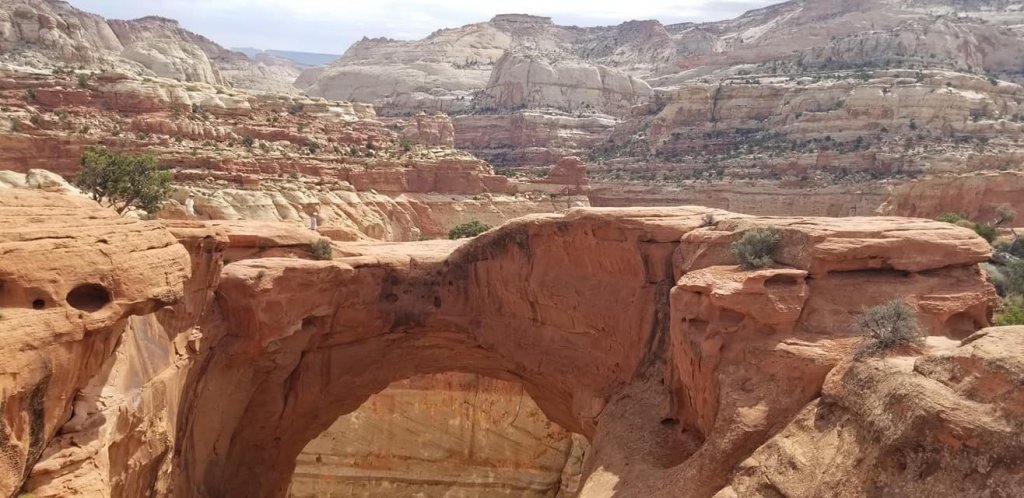
Despite often being overlooked by its more famous neighbors, Capitol Reef still has much to offer. Eat a freshly baked peach pie with local peaches, learn about the native history of the region, or hike to a remote corner of the park. Any of all of these options are available and make for a full and fun visit.
We were initially hesitant to even go to Capitol Reef. We were worried that it looked like more of the same and did not have the “must-see” attractions that the other parks have. However, we are very glad that we made our way out here.
Since the park gets far fewer visitors each year, this lends itself to a somewhat isolated feeling– but in a good way! We felt almost like we had gone back in time while in the park. Maybe that had to with the fact that there is a historic shop that you can buy pies or that you are really far away from other locations that this park has an altogether different feel to it. What did you think of Capitol Reef, if you’ve visited? Let us know in the comments!
Day 6: Canyonlands
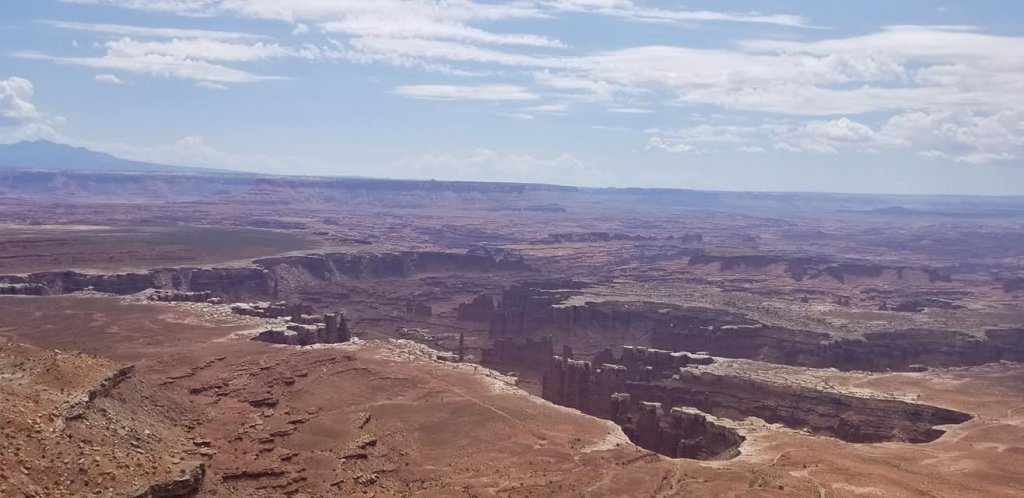
The biggest national park in Utah, Canyonlands is a world unto itself. Vast terrain, amazing rock formations, and great camping spots really make Canyonlands a spectacular place to visit and hike. There is so much here that we feel that if you had to pick one national park (in order to get the most varied experience)– Canyonlands would be it. With three distinct sections of the park (The Island in the Sky, The Maze and The Needles), it’s important to be prepared and have an idea for what you want to prioritize, as it is very easy to get overwhelmed with options here.
Situated near Arches, Canyonlands does not get as many visitors each year as its more popular neighbor, but this does not mean you should skip it! Canyonlands has so much to offer for any intrepid soul.
We stayed in Moab in order to check out both Canyonlands and Arches, and found it to be perfect for our needs. Moab felt huge in comparison to the places we had previously stayed! Give yourself at least one day to explore just the Island in the Sky area, as it is the most accessible and has the easiest hikes.
Being such a large park means that you have to drive long distances to get from one site to the next. The good thing is that driving around Canyonlands is definitely part of the experience, and is a great way to start wrapping your mind around just how magnificent this park truly is. The Island in the Sky district is elevated and gives you spectacular views of the whole park, and be sure to check out the Grand View Point at sunset if possible to get the best colors and ambiance.
As for hikes, there are too many to mention, but we really enjoyed hiking up to Upheaval Dome for the oddity that is the dome itself and the spectacular Grand View Point hike. We definitely want to come back and visit The Maze or the Needles districts as they are both ideal for rugged backcountry exploring. Did you visit either of these areas? What did you think? Let us know in the comments!
Day 7: Arches
 The final national park on our trip was Arches.
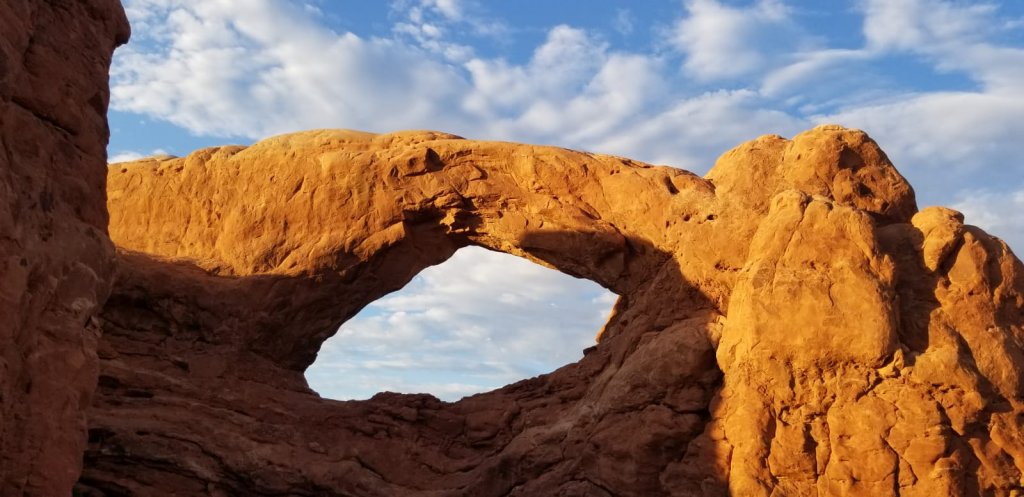
Arches is most likely the most famous national park in Utah, and one of the most famous in the country. With over 2,000 of the titular (you guessed it!) arches in the park, you would be hard pressed to find a place in the world like this national park. There are so many arches everywhere you look, both as you are driving along the main road and as you hike into the park.
The crown jewel in this park is the Delicate Arch, an astounding rock formation that you absolutely can’t miss if you visit this park. It is definitely worth the two and half hour hike, as it is much better in-person than in the photos. Be sure to take water on this hike, as it is very exposed– there is little shade, and the sun is very strong here. Likewise, make sure you are aware of your surroundings as there are some parts that you could step wrong and hurt yourself.
For those looking for an easier hike where you can still see some great arches, check out the Windows section. A gentle uphill hike for 30 minutes or so will take you to two large arches in a rock face. These are beautiful alone but you can walk around the back of the arches for another great view. Another option near the Windows section is the Turret Arch, which is very nice, too– especially late in the day when the sun is coming through the arch. Also near this park area is the Double Arch trail, which is very popular. The Double Arch is such a unique, interesting formation– we definitely recommend checking it out.
All in all, Arches National Park is so, so impressive! There are so many beautiful arches to see, and you will be impressed by their variety. However, we found Arches to be by far the most crowded of all of the parks in Utah, and sometimes this was a hindrance to our enjoyment of the park. With this in mind, arrive early and prioritize the things you want to see most first, to avoid the heat and the crowds.
Day 8: Salt Lake City
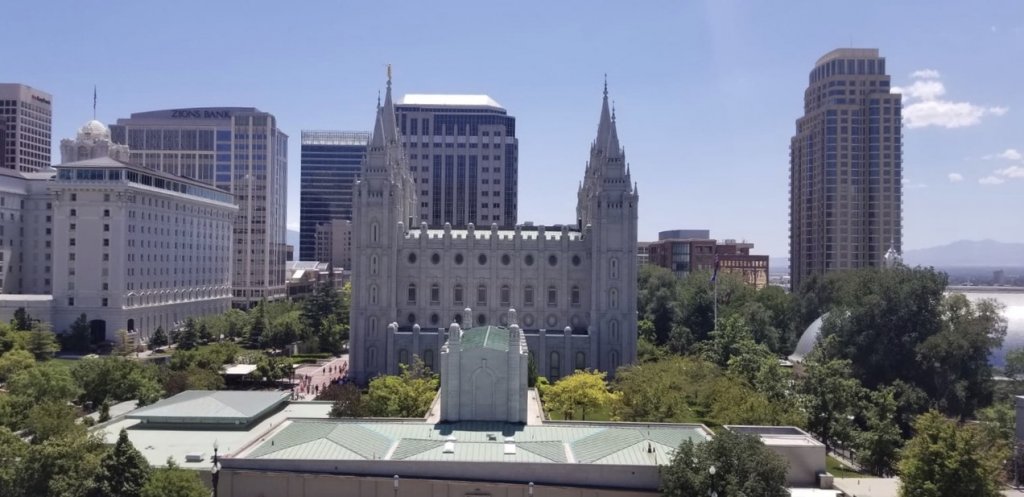
While not exactly a hiking destination, it’s worth setting aside some time to explore Salt Lake City, “The Crossroads of the West” while you’re here, especially if you’re flying in and out of the airport here. It’s pretty navigable by car, or check out the city’s bike-sharing program, GreenBike!
Top 6 Salt Lake City:
- Utah State Capitol: situated on beautiful grounds with beautiful views, you can’t miss checking out the Utah State Capitol!
- Temple Square and the Salt Lake Temple: the Salt Lake Temple is certainly a marvel of engineering, and the 6 spires seem to extend forever! The Neo-Gothic/Romanesque temple is made of quartz monzonite, and serves as the HQ of the Mormon faith.
- The Campus District, “U of U”, Red Butte Garden: The Campus District (where we stayed) is a really great part of town! The U of U is great to walk around and explore, and the Red Butte Garden and Arboretum is one of the largest botanical gardens in the U.S., with 21 acres of gardens and 5 miles of trails.
- Utah Olympic Park: Utah hosted the 2002 Winter Olympic Games, and the park still offers year-round outdoor fun for any range of activity levels.
- The Great Salt Lake + Great Salt Lake Marina: the Great Salt Lake is the largest saltwater lake in the Western Hemisphere– only a little bit less salty than the Dead Sea! You can rent paddle boats or canoes, or just hang out in the marina.
- Bonneville Salt Flats: these salt flats are super vast, almost 100 cubic yards! Tons of car commercials and movies have been filmed here, and the only salt flat in the U.S
Have you visited any of the Mighty 5? What did you think? What was your favorite? Let us know in the comments! We hope you enjoy your visit to these incredible national parks!
