Making the Most of Your JR Pass in Japan

by Tegan

To save you the trouble, here’s a step-by-step guide with tips and tricks for making the most of your JR Pass. We’ll tell you all about how to get a JR Pass, as well as a guide to using your JR and subway passes in Japan.

We originally thought to include this information inside our Tokyo Guide, but it got so long so quickly that we figured it merited its own post. Getting the JR pass isn’t particularly straightforward, but it is worth it. The freedom to come and go as you please on the JR-branded trains while in Japan is worth its weight in gold. You just have to figure out the system first: something we wish someone had done for us beforehand. 

If you arrive in Japan attempting to purchase a JR Pass, you are too late
You must purchase these in your country of origin, and far enough in advance to ensure they arrive at your home address on time. Read on for our best tips for making the most of your JR Pass!

  1. Go to this site, select your pass length (7, 14, 21 days), and fill out your information. Be really careful when filling this out— if it doesn’t match your passport exactly they will not give you the pass. After you finish filling it out, you will receive an exchange order (a voucher, essentially.) We received our exchange order via Fed-Ex about a week later, and had to go pick it up in person because we weren’t home in the middle of the day when they tried to drop it off. You need to have the physical copy of this exchange order to then exchange it in Japan for the pass.


  2. When you arrive in Japan, follow the signs for a JR Office, keeping in mind that if you arrive late at night they will not be open. At Haneda the JR Office was right by the information desk in the arrivals hall, but you can go to Tokyo Station to get it as well, or another major train station.


  3. Once inside the JR Office, they will make sure you entered the country legally (looking at your passport stamp), ask for your exchange order, and ask for an activation date. This date can be up to 30 days away.
      • Tip: Double- and triple-check your dates prior to activating your pass, and be strategic about when you activate the number of days you bought.
        For example, we knew that we were going to Kyoto and later to Seoul, with a few days in Tokyo after returning from Seoul.
        With that in mind, we made sure to activate our pass for the 7 days prior and including the day we left for Seoul, in order to take the otherwise-$20 one-way Narita Express. We then planned to go to Kyoto and other day trips immediately before Seoul, in order to take the shinkansen. We recommend plotting out what you want to do and when in order to best take advantage of this.
      • Once you activate your pass, you can’t change it for any reason, so be really vigilant here! And speaking of vigilance, if you lose your pass, you are out of luck. Store it with your passport and don’t let it out of your sight.
      • You must exchange the voucher individually, in person. You cannot send one member of your group to exchange all the vouchers.

Mythbuster: this rail pass does not allow you to go on “any train in Japan,” but rather the JR-branded trains. The other subway lines, buses, and other modes of public transit are privately owned and do not qualify.
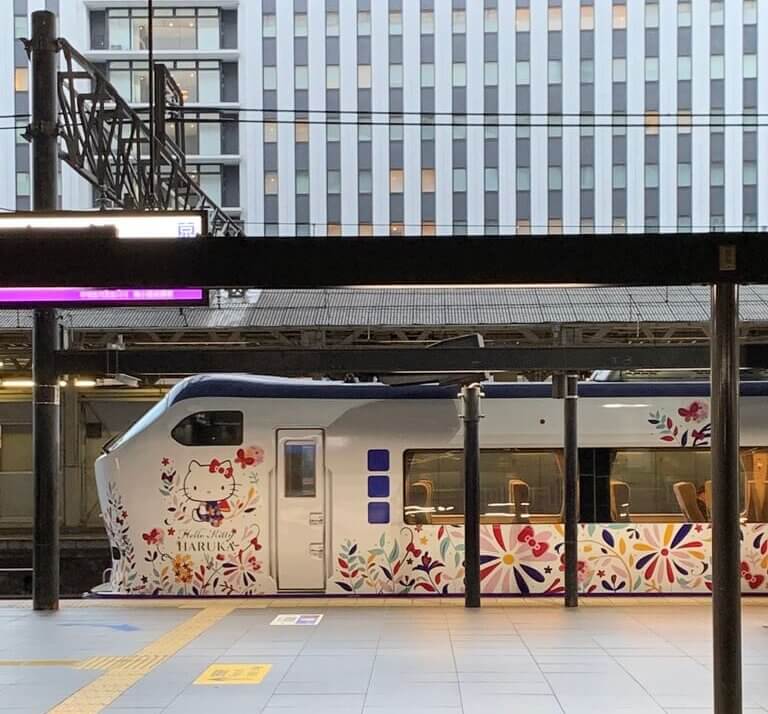
However, we found that you can get most places (including out of the city on the shinkansen bullet trains) using the pass, paying for 1-way subway rides when needed using our Suica card (more on that below.) Sometimes your ride will get a bit longer, but it’s worth it to not have to pay for a different fare– the trains in Japan are absolutely magical, but they aren’t cheap. 

Is the JR Pass Worth It?

Many wonder if the pass is still worth it, given its limitations. After doing a lot of number-crunching, we truly believe that it is, with a caveat. If you are only visiting Tokyo, you may be better off skipping it. If you are visiting anywhere outside Tokyo (such as Kyoto, Osaka, or other cities or towns), the ability to ride certain shinkansen (all except for the Nozomi and Mizuho lines) is great. To put it a different way, a 7-day JR Pass costs about the same amount as going from Tokyo to Kyoto one-way via shinkansen.

When to use JR and when you need a ticket:

Tips and Tricks for Making the Most of Your JR Pass suicaSomething we had to figure out quickly is when to use just the JR Pass and when you also need a ticket, or to use your Suica card. A Suica card is a reloadable fare card– essentially like a CharlieCard in Boston or SmartCard in Washington, D.C. We picked up our Suica at the Marunouchi Central JR East office in Tokyo Station, but you can also buy them from the ticket machines at JR East stations. 

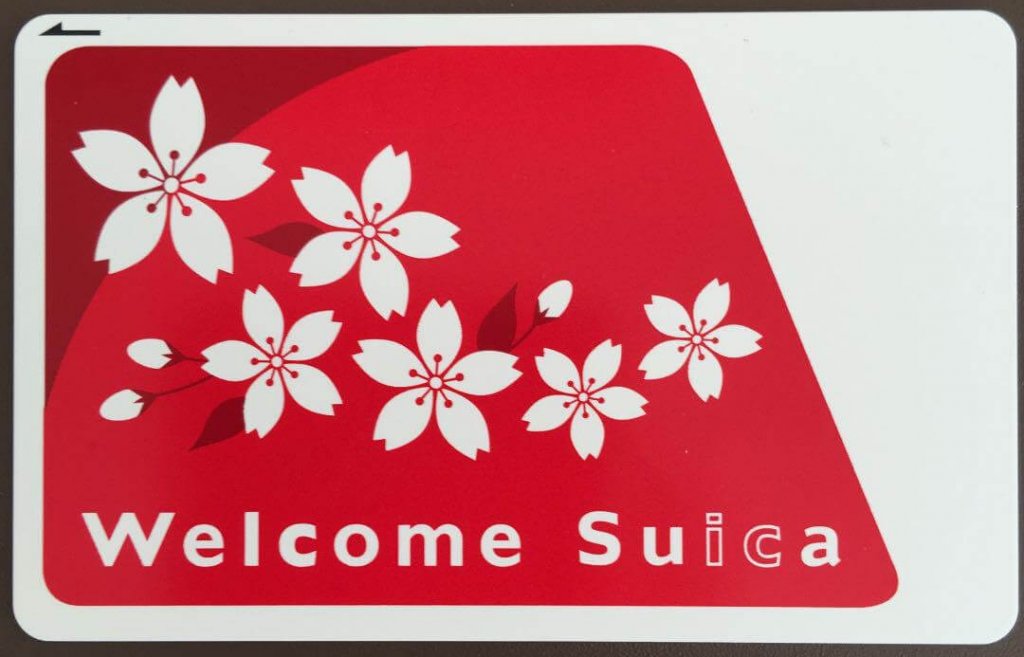
Tip: Be sure to get the Welcome Suica card if you are staying less than 28 days in Japan, as these have no deposit! Depending on where you’re staying, you can get a Welcome Suica at JR East Travel Service Centers at Narita Airport Terminal 1 or 2/3 stations, Haneda Airport International Terminal station, Tokyo Station, Shinjuku Station, Ikebukuro Station, Ueno Station, or Hamamatsucho Station. They are super easy to use– you just load them up with the amount of fare you want to add, and tap them onto the entrance and exit kiosks to enter the subway, buses, and trains. You can also use them to buy snacks and coffee at convenience stores inside stations and to rent coin lockers. In short, they are a godsend. 

Note: If you didn’t get the Welcome Suica, you will want to return your card at the end of your stay in Tokyo in order to get your 500 yen (~$5 USD) deposit back.

Relatedly, a word to the wise...

Although the JR Pass allows you to board participating trains without an individual ticket, we really recommend booking tickets in advance for the places outside Tokyo you know you want to go. Many travel sites will lead you to believe that you can just hop on and off all the trains in Japan with the pass. This is super misleading. While you are theoretically able to walk onto JR trains, it’s a much better idea to book seats. For example, the shinkansen to Kyoto has “unreserved” seats on the first 5 cars. These are a total mob scene to try to board (picture a lot of elbowing and jockeying before the train even arrives), and chances are you will not be able to sit together. 

If you present your JR Pass at any JR office, they can show you the timetable and you can pick when and where you want to go, no elbowing needed. This is a lesson we learned the hard way, attempting to travel during the Japanese high holidays. Japanese people were all off work, and wanting to go to Kyoto to pay visits to temples and other sacred sites, and all the trains were fully booked. We ended up barely squeezing onto the last train leaving Tokyo at 10PM, not arriving in Kyoto until the wee hours and making our jet lag a lot worse.

Tip: Take our word for it and plan ahead and book tickets for trips like Kyoto or Osaka right when you validate your JR Pass. This is the best advice we have for making the most of your JR Pass. If you are flying back home via Narita, book your Narita Express seats ASAP, too, as you are not allowed to just walk on and they fill up super quickly. The peace of mind of knowing you have a seat is so worth it.

Should You Get a SIM Card?

Lastly, the decision about whether or not to get a SIM card… we are trending more and more towards getting one when we travel these days, despite liking to disconnect when we travel. While Wifi is fairly readily available in Japan, we like the added layer of security of being able to turn on the data and check maps if we needed to (or maybe even post a quick Instagram story.) However, you could probably go either way in Japan. We bought the 1GB option, the lowest amount of data available and the cheapest option. It cost us about $30 USD, and didn’t use even close to the amount of data it gave us. We kept it turned off about 95% of the time.

What about taxis or ride-shares?

As far as other modes of transit… the train is king in Japan, and for good reason. Ubers and taxis certainly exist, but are so outrageously expensive that they may as well not. Our first day in Tokyo we checked how much it would cost to get to the TeamLab Borderless facility (see our Tokyo Guide for our review of this fantastic place!) and were gobsmacked to see that it would cost $80 to go less than a 20-minute ride away. 

Now that you’re all set with your validated JR Pass, Welcome Suica card, and SIM card… it’s time to get into the center of Tokyo! We flew into Haneda and out of Narita, so we experienced both airports in all of their glory and chaos.
That said,
fly in and out of Haneda if possible, it’s SO much easier to get back and forth to Tokyo city center. Narita can be a bear to get to, especially if your JR Pass already expired or if you don’t have one. The Narita Express is included with your JR Pass, but is very expensive to book on its own (about $20 USD each way.) While the Express train makes it super easy to get to Narita, it is much further away than Haneda. If you don’t take the Narita Express, like we did, it’s very easy to get confused and go to the town of Narita instead of Narita Airport on local subway transportation. 

How to get from the airport to the center of town

To get from Haneda to the center of the city, buy a 1-way ticket at the entrance to the train lines and enter the subway. Depending on where you are going, you can take the appropriate line. We were staying near Tokyo Station (which we super recommend, see here for why!) so we took the blue Tokyo Monorail line and changed to the green Yamanote line, getting off at Tokyo Station about half an hour later.

To get from Narita to the center of the city on the Narita Express takes a little over an hour. To get from Narita to the center of the city on the Skyliner (a similarly pricey train option to the Narita Express) costs about $20 USD and takes the same amount of time.
To use local transportation (which costs about $9 USD), take the Keisei Line, transfer to the JR Narita line, switch to the Sobu line (Tip: sometimes you stay on the same train, but not always! Pay very close attention here! We almost went to Narita town by accident here) and arrive at Tokyo Station about 2 hours later.

A few last tips...

  • Pay attention to service disruptions and construction to make sure you can go where you need to, 
  • Pay attention to whether trains are rapid (express) or make every stop. The rapid trains skip most intermediary stops, stopping at big hubs like Shibuya or Ueno and skipping the stops in the middle. This is fantastic if you’re looking to go the big stops, but can cause you to miss your stop if you’re not careful
  • Pay attention to where people are standing. Japanese people often line up (standing on the feet icons in front of each car) to board trains, make sure you don’t accidentally cut in front of people
  • Pay attention to each train line’s “theme song”– they’re absolutely delightful. Our favorite was the Yamanote line– what’s yours? Let us know in the comments! 

We hope you enjoyed our tips and tricks for making the most of your JR Pass and Japanese train experience. What did you think of our tips? Let us know in the comments!

Planning a trip to Japan? Be sure to check out our Tokyo and Kyoto walking guides. If exploring other parts of Asia, don’t miss our guides to Seoul, Bangkok, Chiang Mai, and Thai beaches.  

You may also like

This website uses cookies to improve your experience. Check out our privacy policy for more information. Accept Read More